Here’s a step-by-step guide to creating your first Futures Grid Bot on Bybit.
Note: Futures Grid will be channeled directly through your Bybit Funding Account.
Trade via Trading Bot Page
Step 1: Please click on Trade → Trading Bot in the navigation bar to enter the Bybit Trading Bot page.

Step 2: Create your Futures Grid Bot by clicking on Create Now to go to the Create Futures Grid Bot page. The maximum amount of Futures Grid Bot can be created is 50 bots.
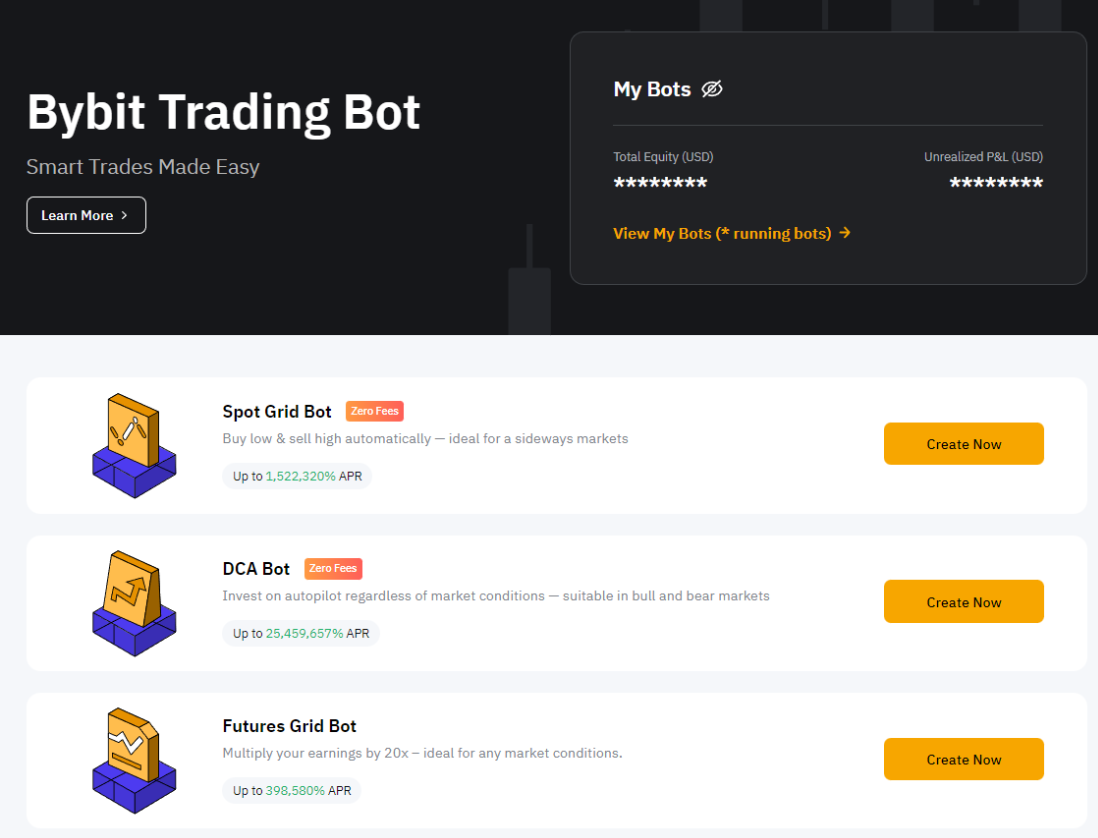
If you've previously created Bybit trading bots (Spot Grid Bot, Futures Grid Bot or/and DCA Bot), you can view the Total Equity (USD) and Unrealized P&L (USD) under My Bots in the upper right corner of the Bybit Trading Bot page.
Step 3: You can create Futures Grid Bots in two ways:
a) AI Strategy
-
Pair: Select Derivatives trading pair
-
Order Direction: Neutral, Long, or Short
Note: Neutral is the default setting. For more information on the difference between each order direction, you can refer to Introduction to Futures Grid Bot.
-
Total Investment: Enter the amount to invest
-
Advanced Settings (Optional) — You can optionally set the following parameters:
-
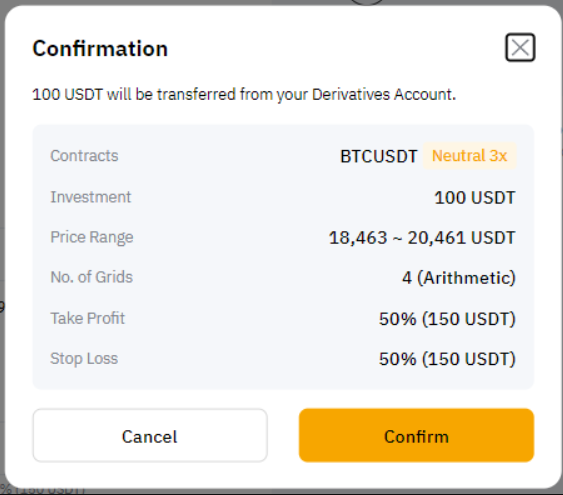
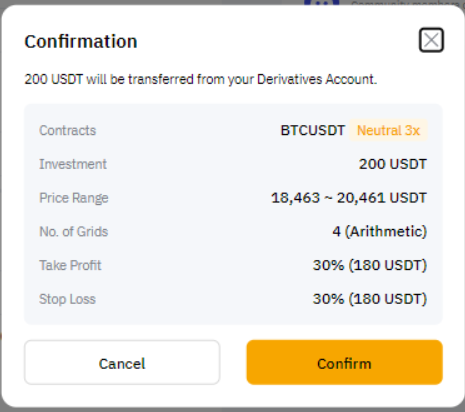
Take Profit. The Take Profit ratio should not exceed 500%.
-
Stop Loss. The Stop Loss ratio should not exceed 100%.
Please note that Price Range, No. of Grids, Profit/Grid and Leverage parameters will be determined based on the historical data performance of the selected trading pair.
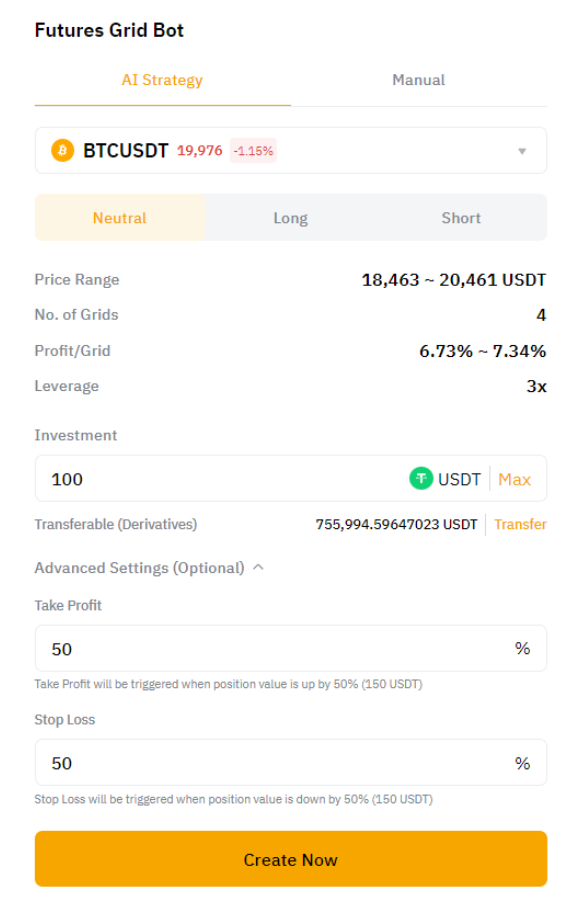
Here’s a tip: If you don’t have sufficient funds in your Trading Bot Account, you can click on Transfer to transfer assets to your Funding Account.
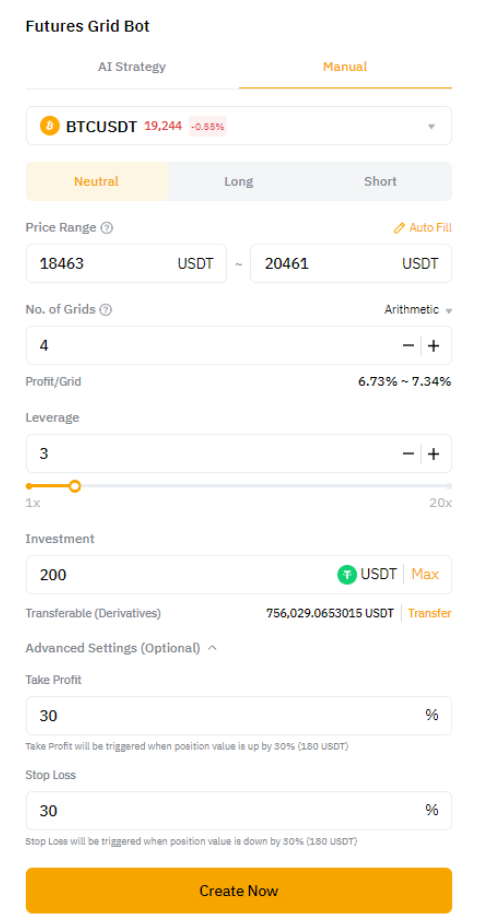
b) Manual
-
Pair: Select Derivatives trading pair
-
Order Direction: Neutral, Long or Short
Note: Neutral is the default setting. For more information on the difference between each order direction, you can refer to Introduction to Futures Grid Bot.
-
Price Range: Set lower and upper price bounds
-
No. of Grids: Enter the number of grids
Notes:
— For Arithmetic, each grid has an equal price difference. For Geometric, each grid has an equal price ratio difference.
— Arithmetic grid is the default. If you want to use a geometric grid, you can select it in the No. of Grids column.
— The higher the number of grids, the smaller the price intervals. This means that in a volatile market your orders may be filled more frequently, but your profits would be lower, due to multiple trading fees.
-
Leverage: Set your preferred leverage
Note: The maximum leverage for all trading pairs in neutral order direction is 100x while it will be 50x for long or short order directions. If you don’t choose any settings, the default leverage is 10x.
-
Investment: Enter the amount you wish to invest
-
Advanced Settings (Optional) — You can optionally set the following parameters:
-
Take Profit. The Take Profit ratio should not exceed 500%.
-
Stop Loss. The Stop Loss ratio should not exceed 100%.
Then, click on Create Now.
Following are the definitions of the two terms for your reference:
-
Take Profit: When the position value rises to the percentage value set by the trader, the take profit will be triggered, and the position will automatically be sold to lock in your profits.
-
Stop Loss: When the position value falls to the percentage value set by the trader, the stop loss will be triggered, and the position will automatically be sold to limit your loss.
Step 4: Please double-check the grid bot information you’ve created, and then click on Confirm to start trading.
Your Futures Grid Bot has been successfully created!
After you click on Confirm, the page will automatically redirect to My Bots for you to view your active grid bots.
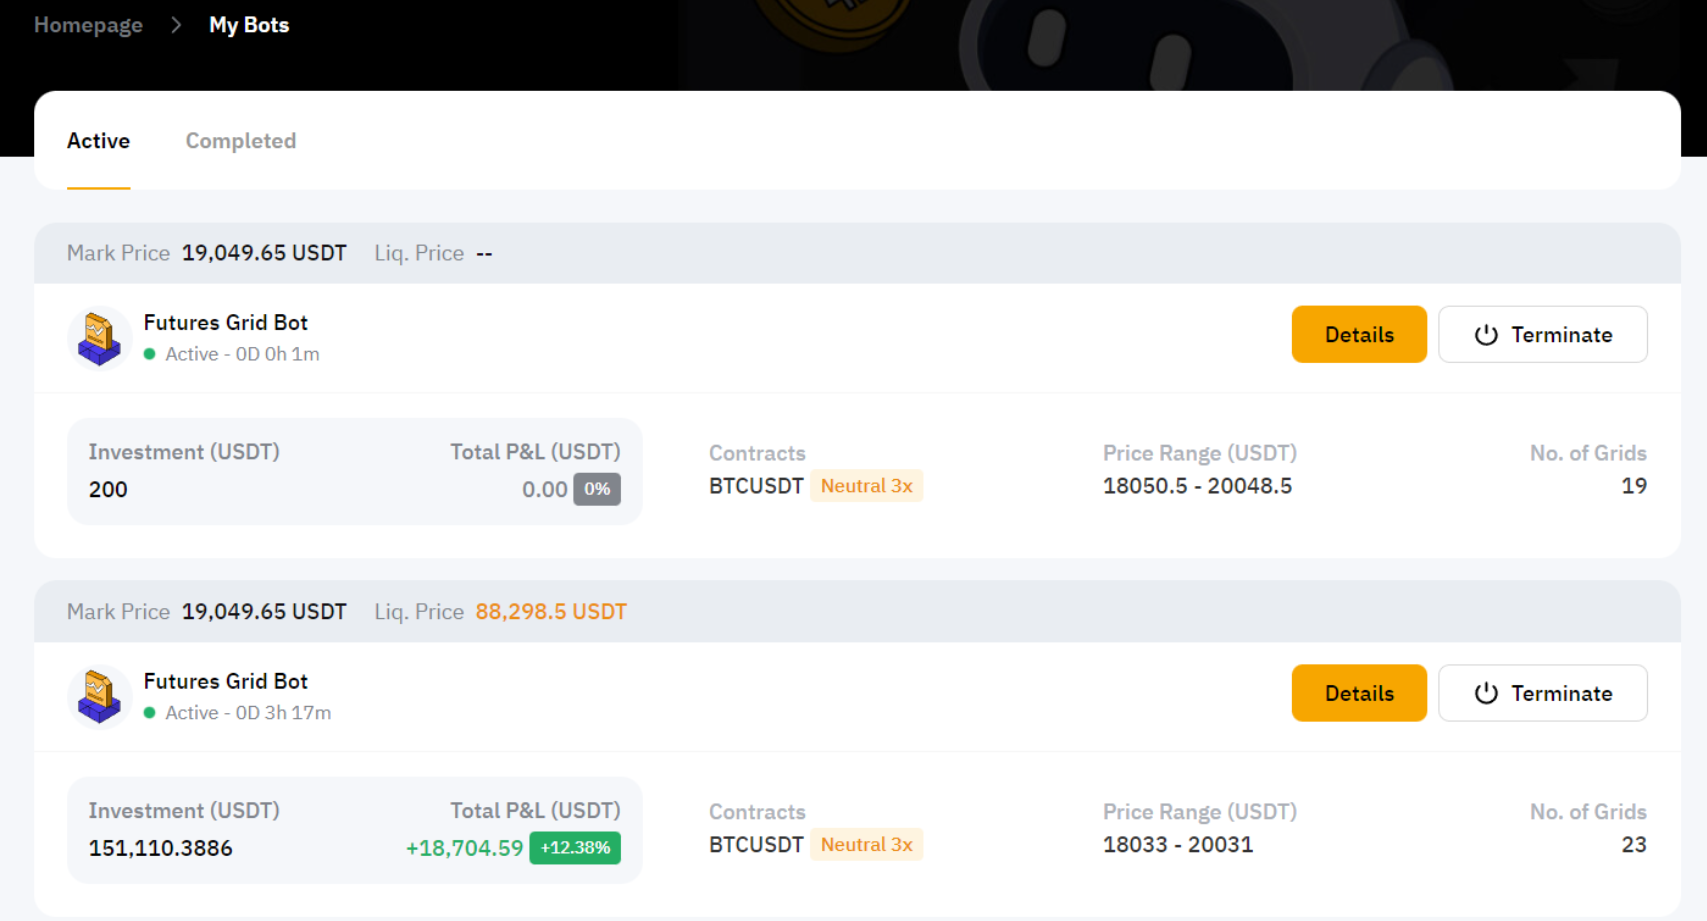
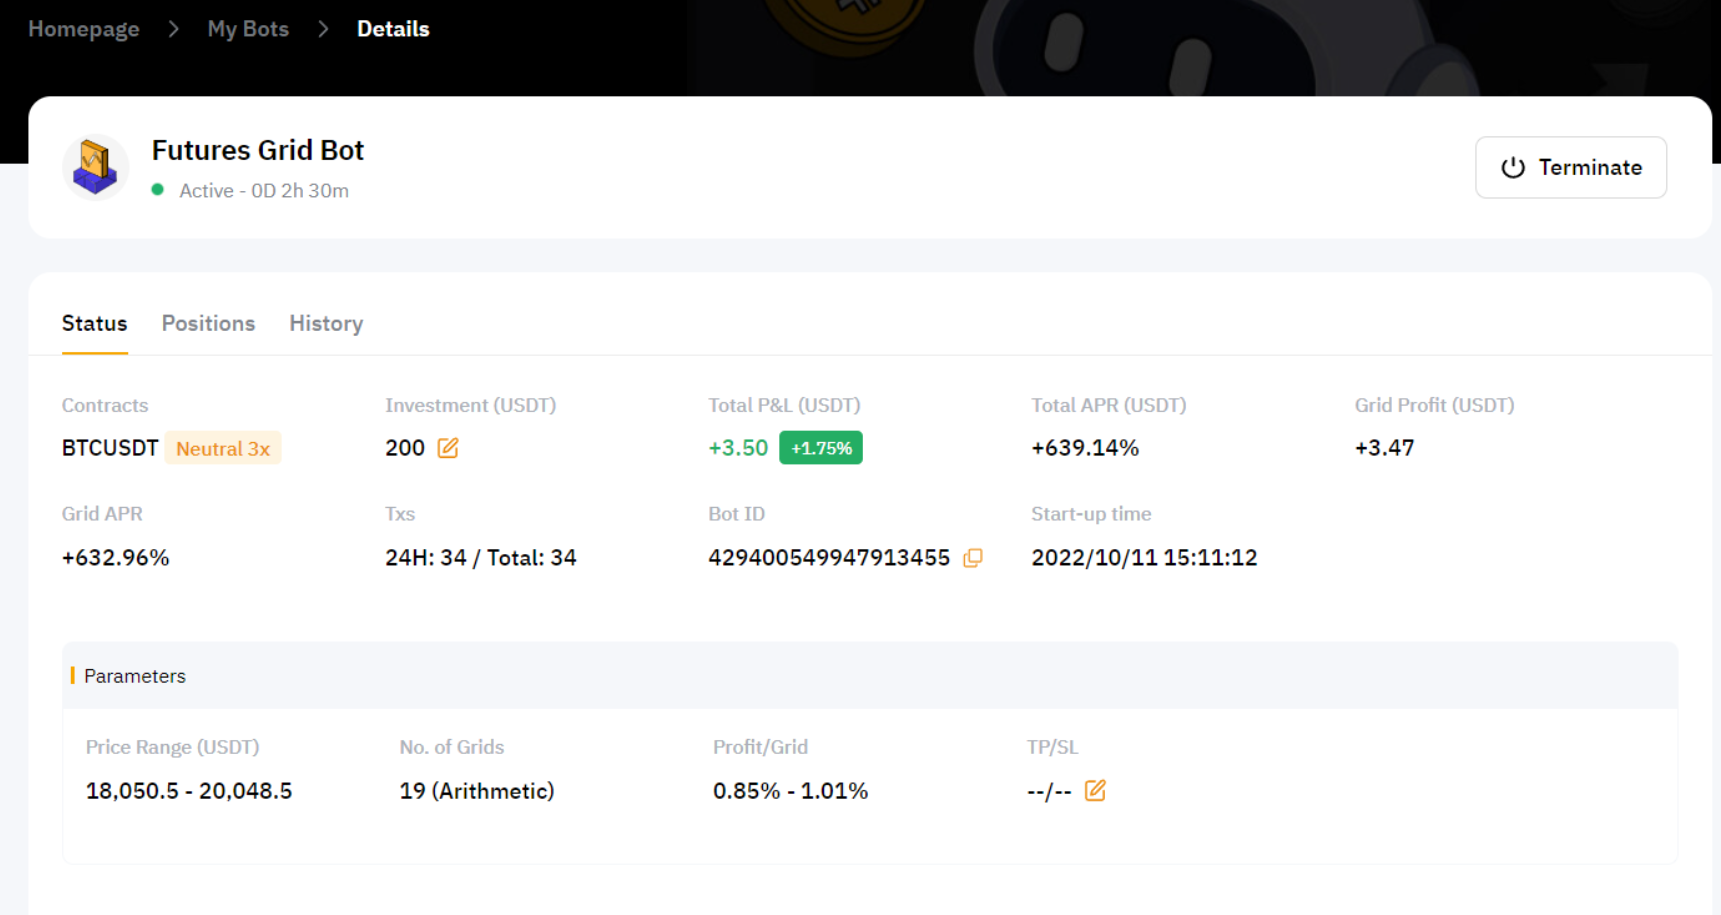
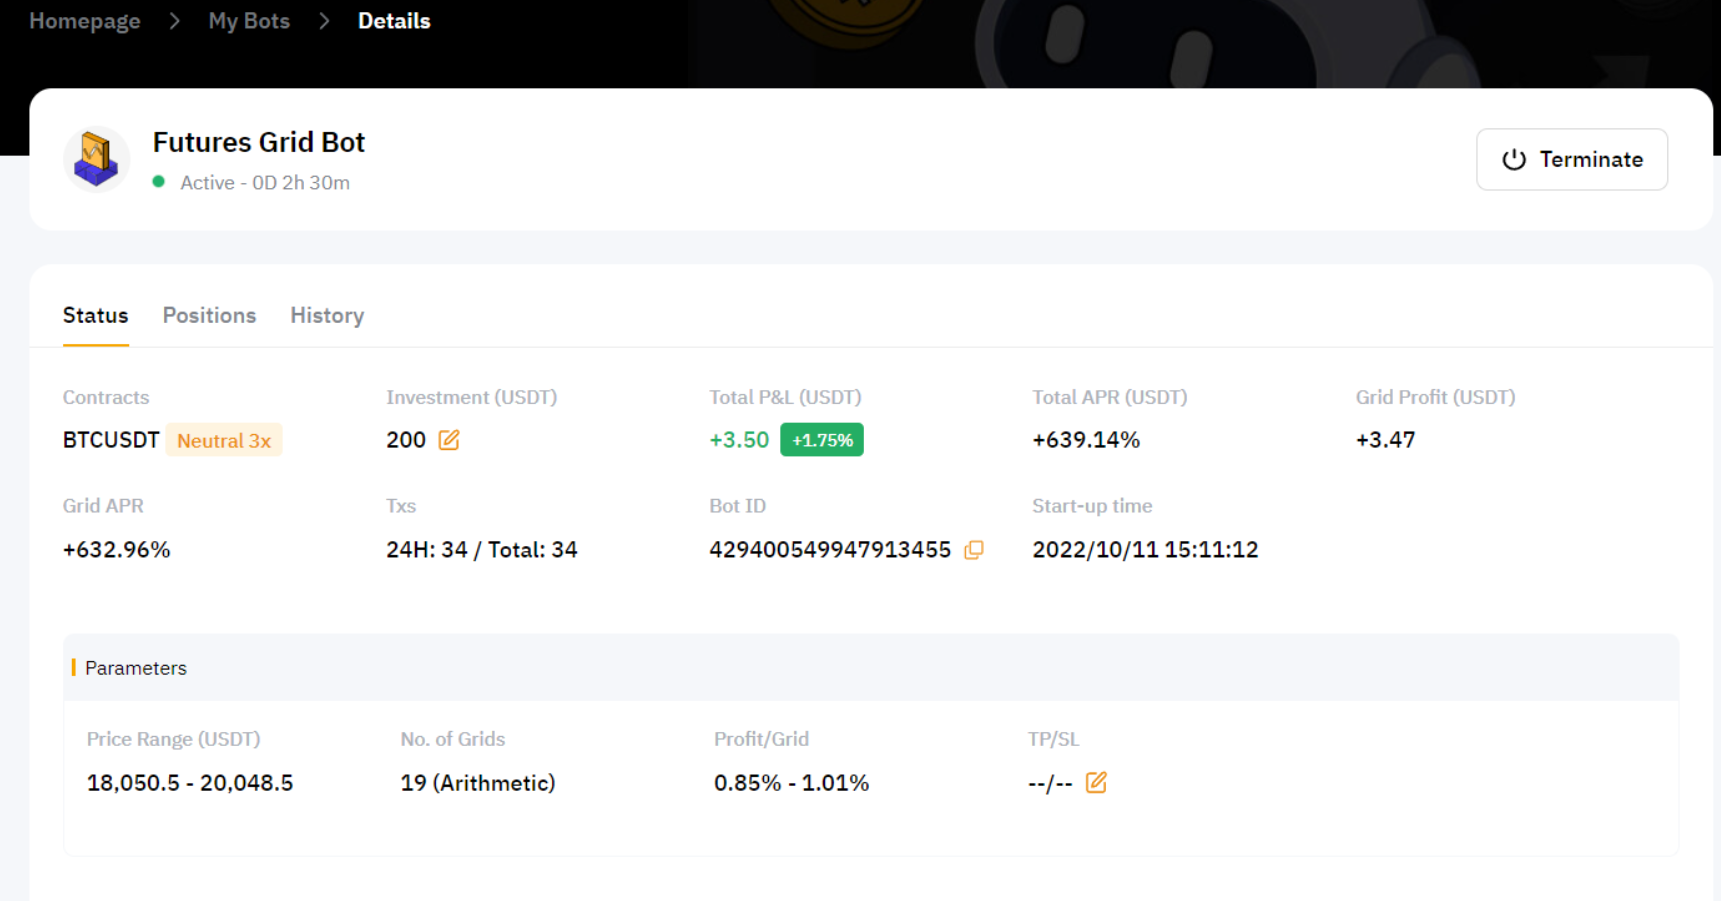
You can click on Details in the upper right corner of the grid bot you want to view to explore more information, including current status of your Futures Grid Bot, current orders under the Positions tab and your order history.
You can also adjust the investment amount or add TP/SL to your position from the Details → Status tab after the Bot is created. Please note that the additional investment only serves to maintain the position in order to avoid liquidation. It does not reset the Grid Bot parameters.
Trade via Derivatives Trading Page
Step 1: Please click on Derivatives → USDT Perpetual in the navigation bar, and select the Derivatives trading pair to enter the USDT Perpetual Trading page.
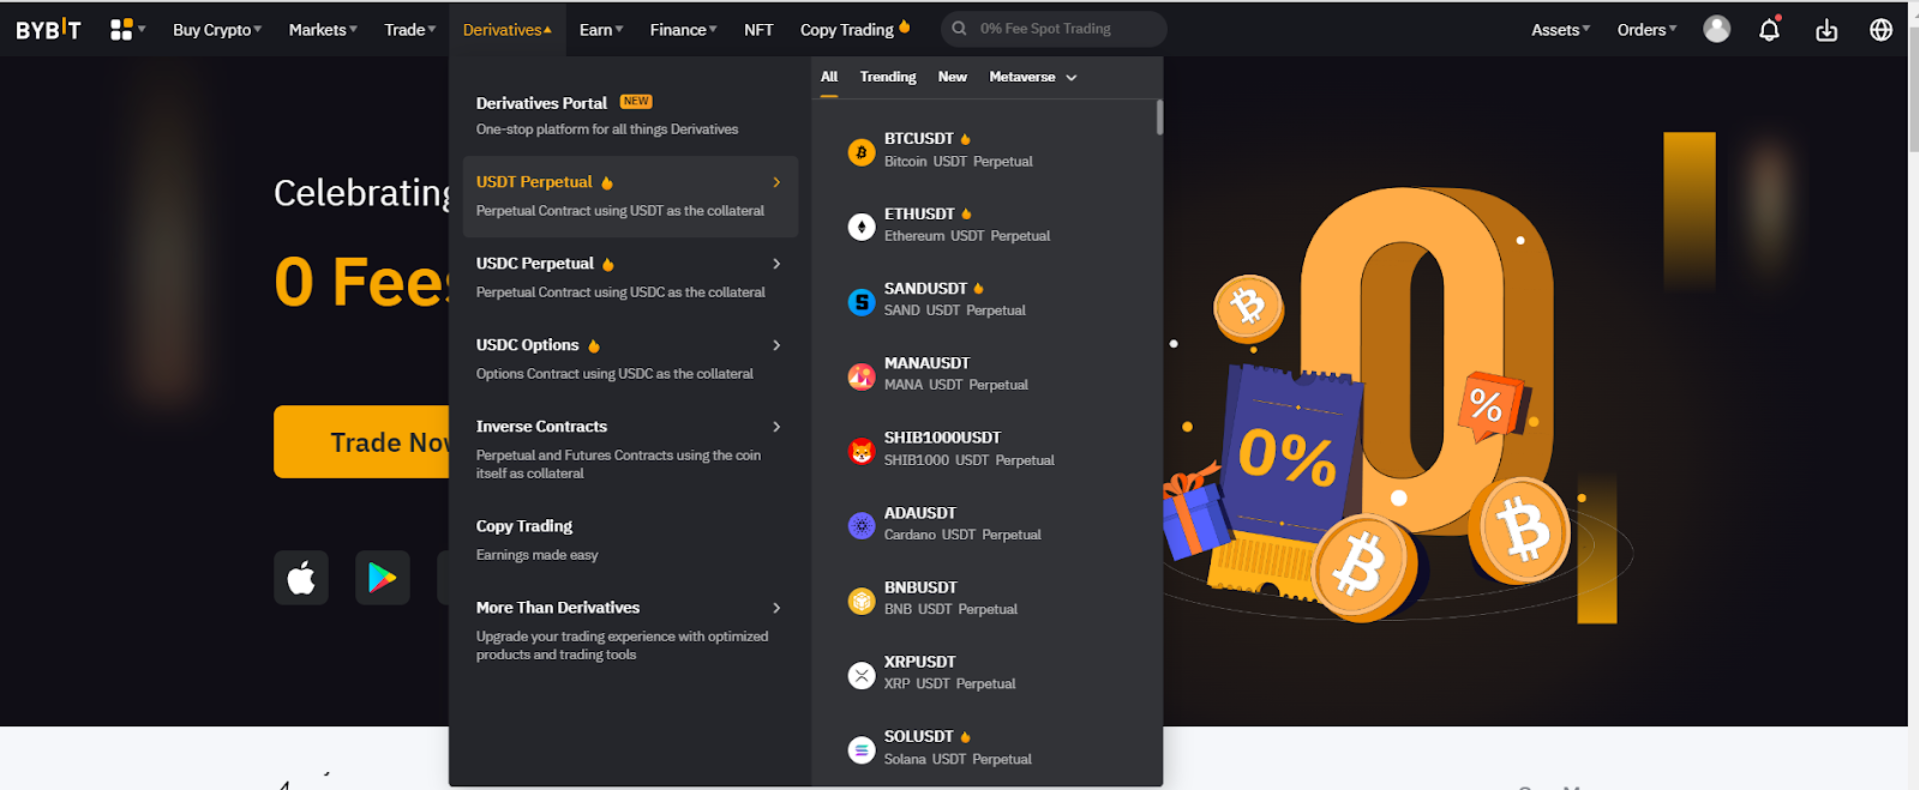
Step 2: Select Strategy in the order zone on the right side of the USDT Perpetual Trading page.

Step 3: You can create Futures Grid Bots in two ways:
a) AI Strategy
-
Order Direction: Neutral, Long or Short
Note: Neutral is the default setting. For more information on the difference between each order direction, you can refer to Introduction to Futures Grid Bot.
-
Click on AI Strategy
Note: Price Range, No. of Grids, Profit/Grid and Leverage parameters will be determined based on the historical data performance of the selected trading pair.
-
Investment: Enter the amount you wish to invest, or use the percentage bar to quickly set the ratio of the investment amount to the available balance of the Funding Account.
-
Advanced Settings (Optional) — You can optionally set the following parameters:
-
Take Profit. The Take Profit ratio should not exceed 500%.
-
Stop Loss. The Stop Loss ratio should not exceed 100%.
b) Manual
-
Order Direction: Neutral, Long or Short
Note: Neutral is the default setting.
-
Leverage: Set your preferred leverage
Note: The maximum leverage for all trading pairs in neutral order direction is 100x while it will be 50x for long or short order directions. If you don’t choose any settings, the default leverage is 10x.
-
Price Range: Set lower and upper price bounds
-
No. of Grids: Enter the number of grids
Notes:
—For Arithmetic, each grid has an equal price difference. For Geometric, each grid has an equal price ratio difference.
— Arithmetic grid is the default. If you want to use a geometric grid, you can select it in the No. of Grids column.
— The higher the number of grids, the smaller the price intervals. This means that in a volatile market your orders may be filled more frequently, but your profits would be lower, due to multiple trading fees.
-
Investment: Enter the amount to invest, or use the percentage bar to quickly set the ratio of the investment amount to the available balance of the Funding Account.
-
Advanced Settings (Optional) — You can optionally set the following parameters:
-
Take Profit. The Take Profit ratio should not exceed 500%.
-
Stop Loss. The Stop Loss ratio should not exceed 100%.
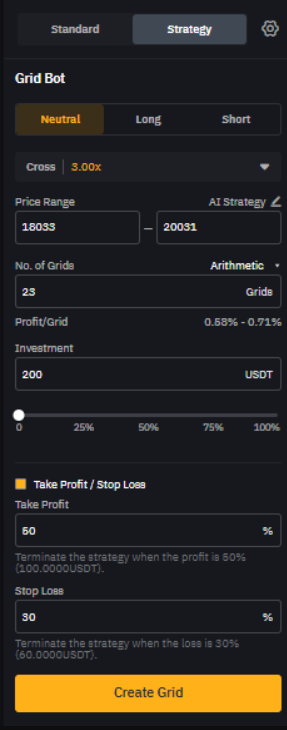
Then, click on Create Grid.
The following are the definitions of the two terms for your reference:
-
Take Profit: When the position value rises to the percentage value set by the trader, the take profit will be triggered, and the position will automatically be sold to lock in your profits.
-
Stop Loss: When the position value falls to the percentage value set by the trader, the stop loss will be triggered, and the position will automatically be sold to limit your loss.
Step 4: Please double-check the grid bot information you’ve created, and then click on Confirm to start trading.
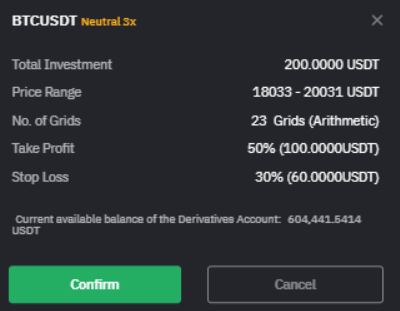
Your Futures Grid Bot has been successfully created!
Next, you can view active or closed Futures Grid Bot details under Active or History, respectively, in the position tab. You can also adjust the investment amount or add TP/SL to your position from the Active tab after the Bot is created. Please note that the additional investment only serves to maintain the position in order to avoid liquidation. It does not reset the Grid Bot parameters.

You can click on Details on the right of the Futures Grid Bot you want to view to explore more information, including the current status of your Futures Grid Bot, current orders under the Positions tab, and your order history.